I am in the middle of a fairly
ambitious paint project I have been working on for a friend. I did
manage to take a few in progress shots this time. I thought I would
write an article about the process on how the wood rim of the base
was painted as a means to show I have not abandoned this blog
completely.
This was an unusual project for me as
the scale is not one I usually work in. The rim in particular
looks somewhat like a wood plinth the rest of the base is dug into. I
wanted something much closer to the texture in actual scale than what
I am typically accustomed to. The whole project has been a series of
learning processes that I am lucky to have found myself with. For
those looking to recreate my results, I used a lot of out of
production colours on this model as I was not concerned about needing
to match the formulas exactly in the future and I had quite a few
older paints on hand. The process matters more than the exact colours
however and there are many ways to vary the results.
 | |
| The colours that were used. Top left is Reikland Fleshshade. Top right is Goblin Green and Fiery Orange. Bottom row from left to right are Bleached Bone, Gun Corps Brown, Vermin Brown, and Dryad Bark. |
 | |
| This keyboard is cleaner than mine. |
I based the rim with a mixture of P3
(Privateer Press Paint) Gun Corps Brown and an out of production
(OOP) GW (Games Workshop) colour, Bleached Bone. I chose these
colours because they had both been used on other parts of the model,
but not the same parts together.
I streaked on some OOP GW Goblin Green
and OOP GW Fiery Orange. These colours were also used elsewhere on
the model. I wanted some subtle variation at the end. I probably
could have skipped this step as it was practically all obscured by
later layers, but I like to imagine it contributed to the end result
in ways undetectable by myself.
I laid in the pattern for the grain
with another OOP paint, GW Vermin Brown. There was no attempt at
blending. I simply put down some wavy lines. I actually was not happy
with the direction the lines were going so there was a part of the
rim where I ended up with two sets of wavy lines going in different
directions. These lines were put down for me to keep track of which
direction the pattern was going in further steps.
 |
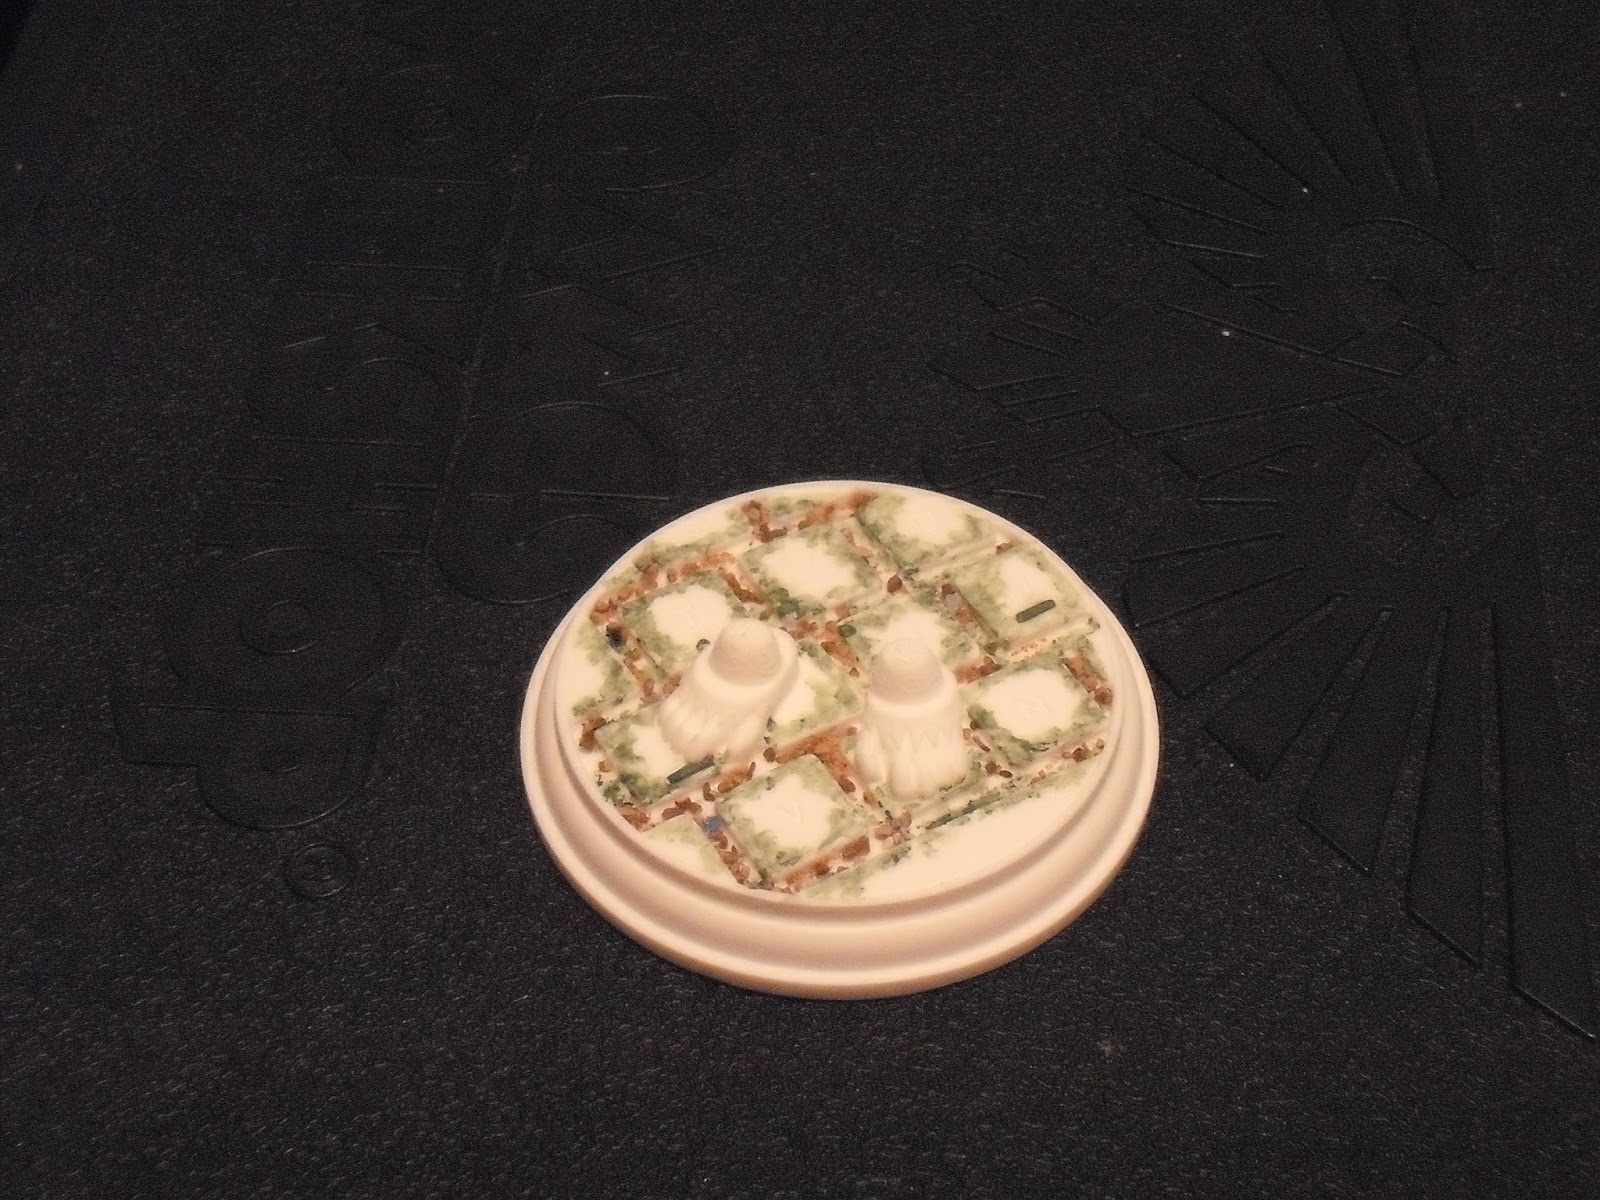
| The pattern is in place. I spent some time working on a couple of bands to ensure I was not wasting my time with this approach. |
I filled in the bands that were created
using a gradient of Vermin Brown up to Bleached Bone using the base
mix of Gun Corps Brown and Bleached Bone as a midtone for the
gradient. This obscured the pattern lines I was ignoring from the
previous step as well as covered up most of the streaking. I did a
little shading and highlighting as I went along, but this step was
primarily about setting in the bands in the grain.

The next step was adding noise. The
idea here was to break up the pattern. The eye will typically finish
a pattern if one is hinted at. I went back and forth between the
previous colours (Vermin Brown, Gun Corps Brown, and Bleached Bone)
as well as added GW Dryad Bark. This colour is still in production
and was yet another colour used on other parts of the model.
Sometimes I was placing dots or lines that ran across the bands of
wood grain. There are spots where I would put down a few dots of
paint then swipe my finger across the surface while the dots were
still wet. I also used this opportunity to pick out a few bands with
the Dryad Bark to be darker than the rest to add some variety as all
the bands were looking very samey to me.
 |
| Another angle of the bands. I did not have viable shots of the steps following this before applying the wash. |
I highlighted the rim with thin passes
of Bleached Bone. This was used on all the raised areas and sharp
edges. I chose three points roughly equilateral to each other around
the plinth to intensify the highlights. I did this so there was at
least one bright point, and possibly two in view from every angle
that was not directly above or below the model where you see three or
none.
 | ||
| Sometimes using the flash, or turning it off as seen here, can make all the difference. |
Shading was done with this passes of
Gun Corps Brown and Dryad Bark.. I dropped the Vermin Brown at this
point as while I needed some in there, the result was skewing more
orange than I really wanted. The Gun Corp Brown was used mostly to
tone down the sharpness of the grain work I did as well as help blend
in the highlights and shadows.
I tinted the wood using multiple thin
passes of OOP GW Reikland Flesh Wash building up to pure Reikland
Flesh Wash. I started by getting the entirety of the wood surface. I
reduced the working area with each pass concentrating the wash into
the recesses and shadows as I went along. I also added more Reikland
Flesh Wash to the mix as I worked so there was less water present as
I progressed.
 |
| Woodn't you know it! |
I applied a brush on gloss varnish (GW
'Ardcoat) to protect the work. I wanted to see how the glossiness
would work with the rest of the model as I moved on to other parts.
This came in handy as I later spot stripped other parts of the base.
I still had some paint chips happen as I was aggressive in my
stripping, but it could have been much worse.
No comments:
Post a Comment